
Removing Unwanted Objects in Pictures: Which Tool Is the Best for You? Part 1
- Ali Menard

- Nov 1, 2023
- 5 min read
Updated: Jan 10, 2024

Part One: AI Generator vs Remove Tool
Recently, I had the pleasure of photographing my brother’s wedding. While they planned to have a beautiful wedding outside overlooking the mountainside, unfortunately, rain had other plans. The ceremony was moved inside a rustic house with quite a few objects on the walls. Don’t get me wrong, the ceremony was lovely, and the house was gorgeous, but it made editing the pictures a bit tricky. Thankfully, there are several ways in which to remove unwanted objects in photographs in Adobe Photoshop. You can use the Spot Healing Brush Tool, the Remove Tool, the Healing Brush Tool, the Patch Tool, or the new AI generator. With the new AI generator tool being recently added to Photoshop in early 2023, it can make removing unwanted objects a breeze. Keyword: CAN. That begs these questions: which tool is the ‘best’ and which tool is going to give me the most optimal results?
Round One: AI Generator Tool
In previous blogs, I have talked about adding objects to pictures or generating entire images by using the AI Generator Tool. Another feature that comes with the AI generator tool is removing objects from pictures. To use the AI Generator, you must have the latest version of Photoshop downloaded (year 2023, version 25.0). When it comes to using the AI Generator, having a less complicated background does not guarantee you get the results you are looking for; however, it does increase the likelihood of a better outcome. To begin, select your favorite selection tool. Typically, my go-to is the Quick Selection Tool but in this instance, I shall be using the Lasso Tool in order to create a precise selection around the object and a small portion of the surrounding wall.

Automatically, the AI Generator tool bar pops up when something is selected. Click inside the box that says, “Generative Fill.” The program will prompt you to type what you want to generate. There are two ways to remove an object using this method. You can type, “remove” and then click generate. Or you can choose not to type anything and click generate. When you don’t tell the program what you want it to generate, the program will automatically fill in the selection you have made with something it deems appropriate based on the picture. I advise typing in “remove” for the purpose of this experiment.

In this case, using the AI generator was not the best option. As evident in the results below, the AI generator was attempting to mimic the other things on the wall and add a similar object which is the exact opposite of what we were trying to do. Using command + z, I undid the process and moved on to the Remove tool.
Pro Tip: Before beginning to remove any objects from any picture, always duplicate the background layer and work on the duplicated layer instead of the original one. The main reason for duplicating the background layer is so you can compare what the picture used to look like verses what it looks like with all the changes. As an added bonus, if you royally screw up your editing, you are able to delete all the edited layers and start fresh.

Round One: Remove Tool
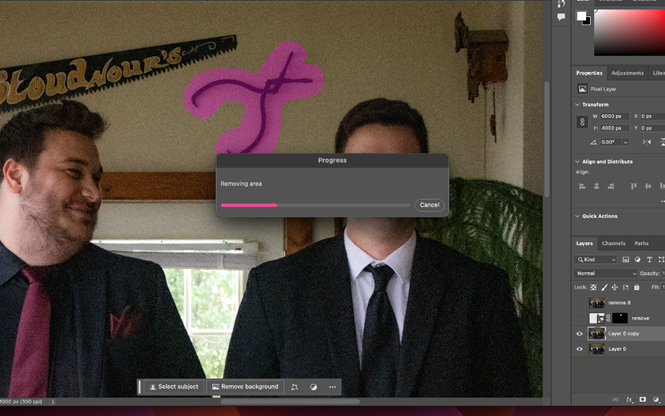
In May 2023, Photoshop added the Remove Tool. If you have ever used the Spot Healing Brush Tool, you will find it works in a comparable manner. If you have not used the Spot Healing Brush Tool, you can compare it to using an eraser. It removes things you want removed without erasing the rest of the picture. To have this tool appear in the tool bar, you must have at least year 2023, version 24.5 of Photoshop downloaded. To select it, click and hold down the Spot Healing Brush Tool, it is the second option, and it looks like a band aid with two little stars next to it.
There are two ways to use the Remove Tool. The first way is to click and drag the tool across the screen over the entire area you want to remove (see the example below).

The second way is to click and drag the tool across the screen around the object you want to remove, and the tool will automatically enclose the object in a pink selection (see the example below).

As you can see from the results below, the Remove Tool outperformed the AI Generator for this particular portion of the picture. I don’t know about you, but I see no evidence that something was there to begin with.

Round Two: AI Generator
As I just stated, for this small little piece of the picture, the better tool to use was the Remove Tool. However, that is not always going to be the case. For example, let us experiment with both tools again on the clock in the picture and see which one holds up the best. Let’s start with the AI Generator. Just like I did the first time, I am going to use the Lasso tool to select the clock. Once the clock and the surrounding walls are selected, I type, “remove” in the AI Generator and click the button, “generate.”


While not perfect, not a bad start at all! Let’s see how the Remove Tool compares.
Round Two: Remove Tool
With the intention of getting rid of the clock on the wall, I held down the Spot Healing Brush Tool on the tool bar and select the Remove Tool. Using the Remove Tool, I select the entire clock by making a shape around the object and allowing the Remove Tool to fill in the section. Once the selection has been made, all you have to do is wait for the results.


Overall, the results between the AI Generator and the Remove Tool are comparable. Looking at the results of the AI Generator, it did not fully remove the shadow to the right of the wall. This of course you could go back and touch up. Looking at the results of the Remove Tool, it managed to mostly get rid of the shadow on the wall and it did manage to keep the line in the wall. However, you can very clearly see a line where the selection was made. Yet again, this is something you can go back and touch up after. From experience, I can assure you cleaning up the picture after using the AI Generator was much simpler than touching up the picture after using the Remove Tool.
When comparing the AI Generator verses the Remove Tool, it is nearly impossible to say which one is better. During the first round of trials, the Remove Tool worked best but during the second round of trials the AI Generator was the better tool. At the time of writing this blog, I had already finished editing all of my brother’s wedding photos and there were a significant amount of pictures that needed those objects in the background to be removed due to the fact that the ceremony took place in that room. Therefore, I already had a grasp of which tool was suitable to use on each object. To my surprise, it was not always either the AI Generator or the Remove Tool. More on that in Part two. Stay tuned.


